Set up your AT&T Mail account in Outlook 2002 or 2003, simply add a new email account to your existing Outlook profile.
- Open Outlook 2002 or 2003 on your computer.
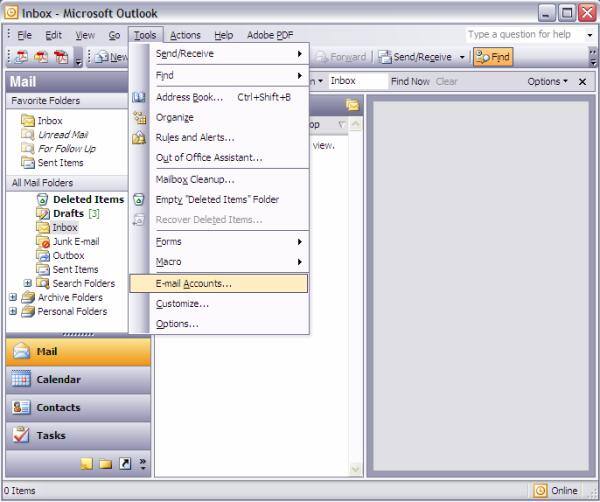
- Select the Tools menu, and then select Email Accounts.

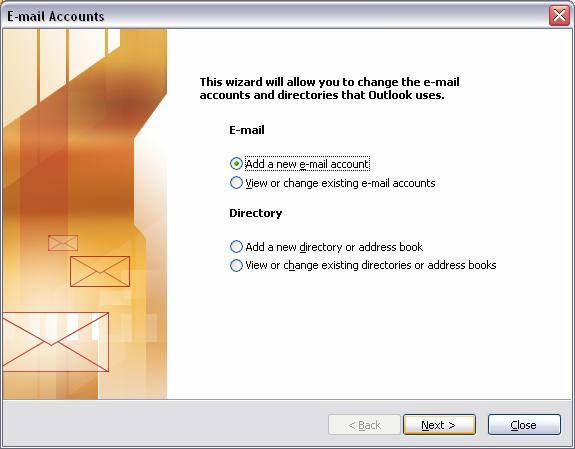
- Select the button for Add a new e-mail account and click the Next button.

- Select POP3, and then click Next.
- In the User Information section:
- Under Your Name field, enter your name the way that you want it to appear to other people.
- In the E-mail Address: field, enter your full AT&T email address e.g., YourName@att.net. If you are setting up this account for an AT&T Email Alias, input the alias email address in this field.
- In the Server Information section:
- In the Incoming Mail (POP3 or IMAP) Server field, enterinbound.att.net
- In the Outgoing Mail (SMTP) Server field, enteroutbound.att.net
- In the Logon Information section:
- In the User Name: field, enter your full email address. If you are setting up this account for an AT&T Email Alias, input the full email address of the ID (Primary or subaccount) associated with the email alias in this field. Do not input the email alias address in this field.
- In the Password field, enter your password.
- Select the Remember password checkbox.
- Select More Settings.
- Select the Outgoing Server tab.
- Verify these settings:
- The checkbox beside My outgoing server (SMTP) requires authentication is selected.
- The radio button Use same settings as my incoming mail server is selected.
- Select the Advanced tab.
- Verify these settings:
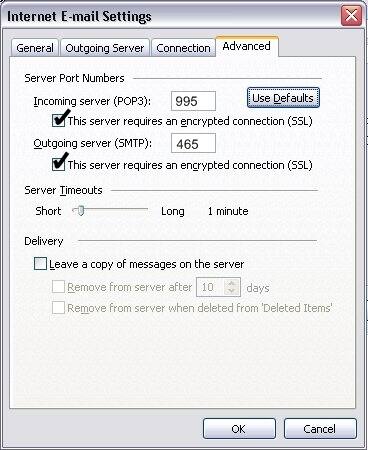
- The Incoming mail (POP3) should be port 995, and the checkbox beside This server requires a secure connection (SSL) is selected.
- The Outgoing mail (SMTP) should be port 465, and the checkbox beside This server requires a secure connection (SSL) is selected.
- Click OK.

- In the Test Settings section, you can test the configuration by selecting theTest Account Settings button. If any information is incorrect or missing, you will be prompted to enter or correct it. You must be connected to the Internet prior to selecting this option.
- Click Next.
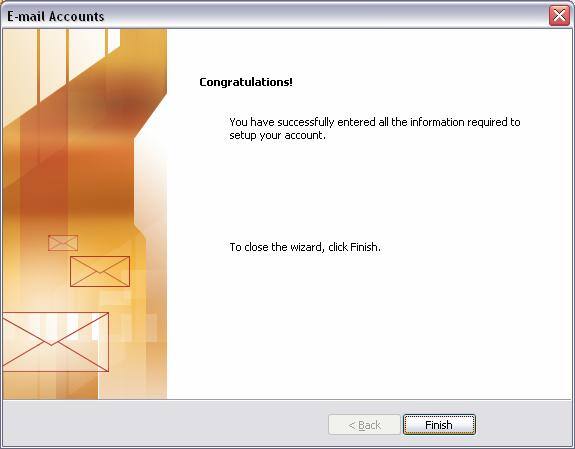
- Click Finish.

"If you find this post helpful and it solved your issue please mark it as a solution. This will help other forum members locate it and will also let everyone know that it corrected your problem. If they have the same issue they will know how to solve theirs"

*The views and opinions expressed on this forum are purely my own. Any product claim, statistic, quote, or other representation about a product or service should be verified with the manufacturer, provider, or party.

May 10, 2014 3:24:06 PM
Set up your AT&T Mail account in Outlook 2002 or 2003, simply add a new email account to your existing Outlook profile.
- Open Outlook 2002 or 2003 on your computer.
- Select the Tools menu, and then select Email Accounts.

- Select the button for Add a new e-mail account and click the Next button.

- Select POP3, and then click Next.
- In the User Information section:
- Under Your Name field, enter your name the way that you want it to appear to other people.
- In the E-mail Address: field, enter your full AT&T email address e.g.,YourName@att.net. If you are setting up this account for an AT&T Email Alias, input the alias email address in this field.
- In the Server Information section:
- In the Incoming Mail (POP3 or IMAP) Server field, enterinbound.att.net
- In the Outgoing Mail (SMTP) Server field, enter outbound.att.net
- In the Logon Information section:
- In the User Name: field, enter your full email address. If you are setting up this account for an AT&T Email Alias, input the full email address of the ID (Primary or subaccount) associated with the email alias in this field. Do not input the email alias address in this field.
- In the Password field, enter your password.
- Select the Remember password checkbox.
- Select More Settings.
- Select the Outgoing Server tab.
- Verify these settings:
- The checkbox beside My outgoing server (SMTP) requires authentication is selected.
- The radio button Use same settings as my incoming mail server is selected.
- Select the Advanced tab.
- Verify these settings:
- The Incoming mail (POP3) should be port 995, and the checkbox besideThis server requires a secure connection (SSL) is selected.
- The Outgoing mail (SMTP) should be port 465, and the checkbox besideThis server requires a secure connection (SSL) is selected.
- Click OK.

- In the Test Settings section, you can test the configuration by selecting the Test Account Settings button. If any information is incorrect or missing, you will be prompted to enter or correct it. You must be connected to the Internet prior to selecting this option.
- Click Next.
- Click Finish.

